Opening your Angel One account for the first time is a major step in life, especially if you are a beginner in the stock market. While filling out the forms, you will probably be excited about the learnings, the profits and the hours of research that you will experience in the following days. In order to get you to that experience faster, we have reduced the time it takes to finish your KYC registration during the Angel One account opening process.
Uploading the PAN card photo during the Angel One KYC registration was a bit of a hiccup for many users as the PAN card was not something that everyone had handy. To solve this issue, we now pull your Aadhaar and PAN data automatically from your account with Digilocker ( a government initiative towards paperless governance). As a result, there are no more uploads required in the entire KYC journey!
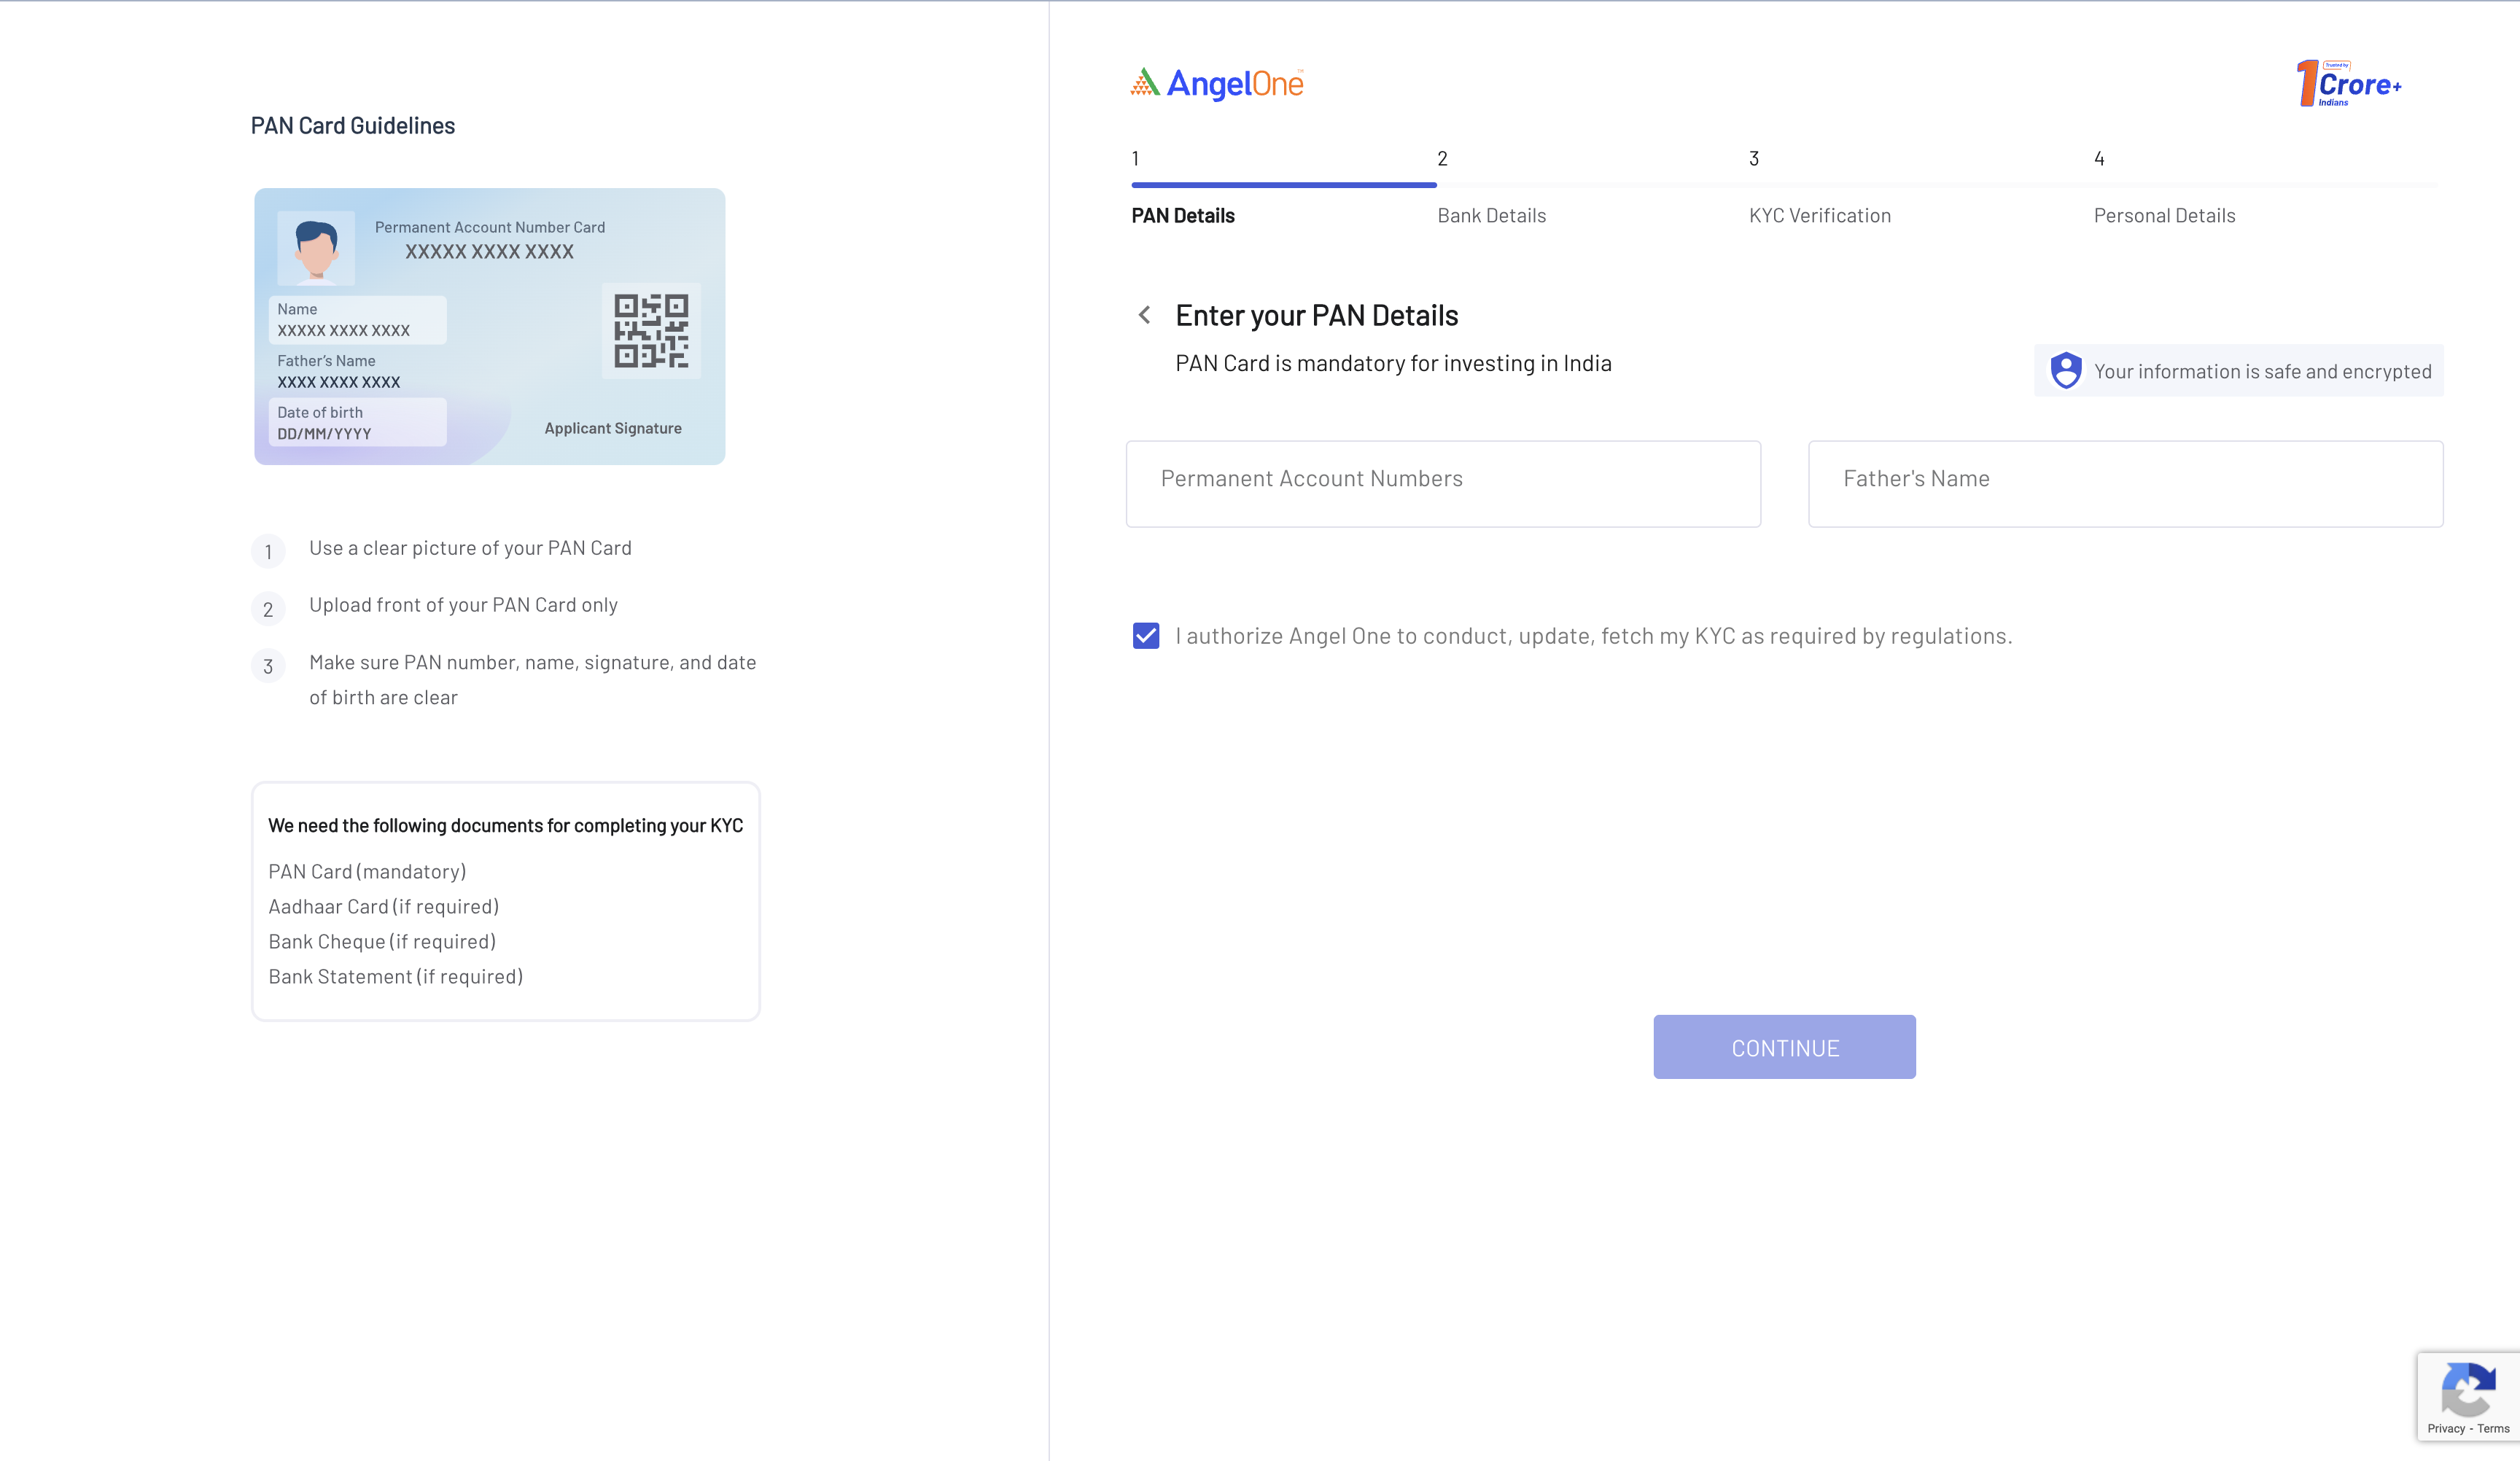
With this latest release, you just need to enter your PAN number and your father’s name, followed by your consent, via an OTP. Digilocker will then collect your Aadhar and PAN details and provide their images securely to Angel One. This process, however, works only for those users who have linked their Aadhar card to their phone numbers and also their Aadhar card to their PAN. The rest of the users will have to manually upload their PAN and Aadhaar documents.You can use the following table to identify which category of user you fall under in this context and thus what your KYC journey will be like:
| Status of PAN, Aadhaar and Mobile number | Your KYC journey |
| Aadhaar linked to both mobile number and PAN | Follow the new simplified KYC Journey (i.e. zero uploads) |
| Aadhaar linked to only mobile number and not PAN |
|
| Aadhaar linked to only PAN and not mobile number |
|
| Aadhaar linked to neither mobile number and PAN |
|
| Aadhaar not available | KYC is then not possible online. |
Let us now look at the exact steps to take in case your Aadhaar is linked to both PAN and your mobile number:
Step 1: Complete your mobile number and email verification.
Step 2: Reach the ” KYC Verification via Digilocker ” page and select ‘YES’. Step 3: Enter your PAN number and Father’s name. Then check on the box below to authorise Angel One to fetch your KYC. Click on ‘CONTINUE’.
 Step 4: On the next page, confirm your consent to allow Digio to fetch your personal details (like name, Aadhaar number and date of birth) from Digilocker and transfer it to Angel One. Just check the box below and click‘AUTHENTICATE AADHAAR’.

Step 5: For Aadhaar authentication, enter your Aadhaar details and OTP.
Step 6: Confirm your consent to let Digiotech fetch your documents from  ’.
’.
Step 7: You will finally receive communication and feedback about your status of document fetching in real-time 
And your KYC document upload is done! You will now be redirected to finish the rest of the account opening process, such as segment activation and nominee addition.
Using Digilocker for automated document pull has the following benefits:
Opening your Angel One account is now a document-less journey! Open demat account with Angel One today and experience trading like never before! Join our Community page for more such updates.
Published on: Jun 21, 2023, 9:34 AM IST
We're Live on WhatsApp! Join our channel for market insights & updates
